Embarking on the journey of creating your first home studio is an exciting step toward realizing your musical ambitions. Whether you’re a budding producer, singer-songwriter, or podcaster, a well-designed space and reliable gear will set the stage for professional results.
Planning Your Space
Selecting the ideal room lays the groundwork for great recordings. Your primary goal is to minimize unwanted noise and reflections while maximizing comfort and inspiration.
- Quiet room free from external noise
- Larger rooms with irregular shapes
- Avoid locations near busy streets
- Use carpets, curtains, and soft furnishings
In addition to choosing the right location, consider basic soundproofing measures such as sealing door gaps and using thick drapes. Soft furnishings absorb mid and high frequencies naturally, but low-end energy often requires dedicated treatment.
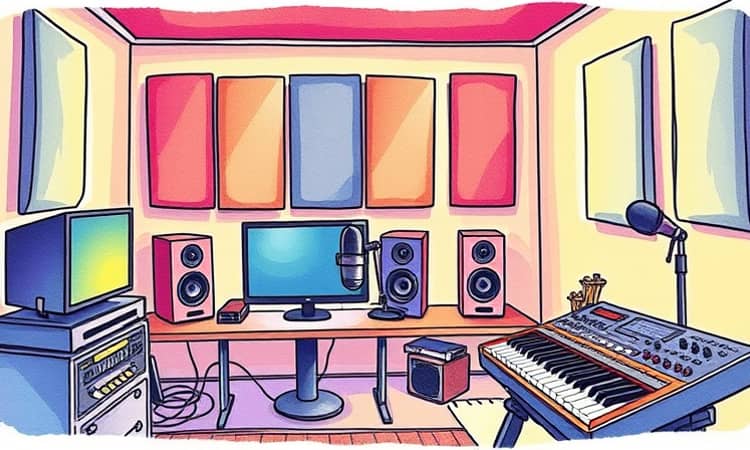
Investing in acoustic panels on walls can transform your recordings, allowing you to capture sound with clarity and precision.
Essential Equipment
Your gear choices will define the quality and flexibility of your productions. Start with a robust computing platform and expand into audio hardware and accessories.
Multiple cores for better processing power ensure your system can handle multitrack sessions and virtual instruments without latency or crashes.
- Computer with multi-core CPU, 16GB+ RAM, and SSD storage
- Digital Audio Workstation software (Pro Tools, Logic Pro, Ableton Live)
- Audio interface (e.g., Focusrite Scarlett, PreSonus AudioBox)
- Condenser and dynamic microphones with stands
- Studio monitors (e.g., KRK Rokit5) and headphones
- MIDI controller for virtual instruments
- Cables (XLR, TRS), pop filter, and external SSD storage
With this foundation in place, you’ll have the essential tools to record, edit, and mix your projects from the comfort of home.
Budget Considerations
Many creators worry about costs when building a studio, but a functional setup can be achieved on a modest budget. A basic system may start around $350 if you choose entry-level gear wisely.
Focus on essentials first: computer, DAW, audio interface and allocate more funds to accurate monitoring equipment.
This guide offers a starting point. Prioritize monitor quality over flashy peripherals to develop a reliable mixing environment.
Acoustic Treatment and Soundproofing
Untreated rooms often introduce unwanted reflections and resonances that can sabotage even the best equipment. Begin with simple fixes like heavy curtains, area rugs, and bookcases filled with varied items.
For tighter control, install bass traps in corners and foam panels at first reflection points. These measures tame low-frequency buildup and smooth out mid-range reflections, resulting in more accurate recordings and mixes.
Remember that professional acoustic treatment can be costly, but DIY alternatives using wood frames and rock wool can deliver impressive results on a budget.
Creating an Ergonomic Workspace
A well-organized studio encourages creativity and minimizes fatigue. Position your desk and chair to maintain good posture, and elevate screens and monitors to eye level.
Effective cable management not only prevents signal interference but also keeps your workspace safe and clutter-free. Use ties, sleeves, and under-desk trays to route cables neatly.
Setting Up and Optimization
Proper setup is the key to unlocking your studio’s potential. Follow these steps to get started:
- Connect audio interface to your computer via USB/Thunderbolt
- Patch microphones and instruments into interface inputs
- Place monitors at ear level forming an equilateral triangle
- Set gain levels and perform a thorough soundcheck
- Adjust DAW buffer size and latency settings
Take the time to fine-tune driver settings in your DAW and interface control panel. Low latency and optimal buffer sizes empower you to record and mix without hiccups.
Adopting regular system maintenance and backups protects your work and ensures longevity for your studio setup.
Future Upgrades and Expansion
Your first home studio is only the beginning. As your skills grow, plan incremental upgrades that align with your creative goals. Stage 1 focuses on refining core essentials—upgrading microphones and interfaces. Stage 2 enhances monitoring with high-fidelity speakers and headphones. Stage 3 delves into advanced acoustic solutions like diffusers and isolation booths for professional-grade sound control.
Balance hardware investments with continuous learning. Courses, tutorials, and hands-on experimentation will amplify the impact of every piece of gear you add.
Building a home studio is more than amassing equipment; it’s about crafting a space where inspiration thrives and ideas come to life. With thoughtful planning, strategic investments, and a commitment to honing your craft, you’ll create a sanctuary for sonic exploration and professional-quality productions.
References
- https://theproaudiofiles.com/setting-up-a-home-studio/
- https://www.avid.com/resource-center/home-recording-studio-setup
- https://foroomaco.com/blogs/studio-essentials/ultimate-guide-home-studio-setup
- https://plus.pointblankmusicschool.com/the-ultimate-home-studio-setup-guide-for-2024-on-any-budget/
- https://www.youtube.com/watch?v=ulOl61oxbyM
- https://ehomerecordingstudio.com/recording-studio-equipment-list/
- https://mixelite.com/blog/step-by-step-guide-to-setting-up-your-first-home-studio/
- https://www.recordingrevolution.com/studio-guide


