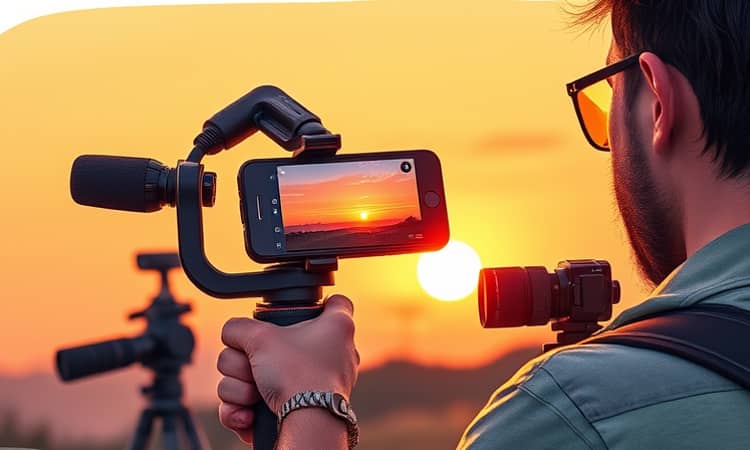
In the last decade, the ability to film high-quality video has moved from specialized studios into the hands of everyday creators. Smartphones have become powerful tools, democratizing storytelling and enabling anyone with a vision to capture moments with stunning clarity. This article will guide you through essential techniques, inspire you with creative insights, and show you how to maximize creative possibilities in filming with devices you already own.
Whether you’re documenting travels, crafting short films, or launching a YouTube channel, understanding the advantages and limitations of mobile filmmaking is the first step toward achieving a professional finish. From harnessing advanced camera settings to mastering post-production on the go, get ready to elevate your video storytelling to new heights.
Pre-Production: Planning for Success
Every great video begins long before the record button is pressed. Start by outlining your concept and sketching a simple storyboard or shot list. This will save time, reduce wasted footage, and keep your narrative focused.
Choose a location with consistent lighting and minimal background noise. Clean your camera lens to ensure powerful and consistent image quality, then decide whether the front or rear camera best suits your needs—rear cameras typically offer higher resolution and better low-light performance.
Consider these steps to streamline your shoot:
- Prepare a script or storyboard to guide each scene
- Set your phone to airplane mode to prevent interruptions
- Lock exposure, focus, and white balance before shooting
- Record ambient sound or room tone separately for flexibility in editing
Mastering Your Camera Settings
Default camera apps often limit your creative control. Invest in a manual camera app like Filmic Pro or Blackmagic Camera to adjust ISO, shutter speed, and white balance on the fly. Aim for a shutter speed roughly double your frame rate (for example, 1/48s at 24fps) to achieve the natural motion blur seen in cinema.
Enable grid lines and compose your shots using the rule of thirds. If your phone supports HDR, activate it when shooting high-contrast scenes to capture deeper shadows and highlight details.
Below is a quick reference for optimal frame rates:
Stabilization and Accessories
Even the steadiest hands can introduce unwanted shakes. Use both hands to cradle your phone, or elevate your toolkit with a tripod, gimbal, or stabilizer. Test shots on each device to find the combination that suits your style.
Mobile lenses and add-ons can dramatically expand your creative palette. Clip-on lenses—wide, telephoto, or macro—allow for diverse perspectives. Attach a lapel microphone or shotgun mic for professional audio quality for videos, and deploy portable LED lights or reflectors to illuminate dark interiors or balance outdoor backlighting.
Composition, Lighting, and Storytelling
Visual storytelling is about more than technical prowess; it’s about evoking emotion. Vary your shot sizes—establishing wide shots, intimate close-ups, and engaging mid shots—to guide viewers through your narrative. Move the camera deliberately, using sliders or gimbals for fluid tracking shots that maintain viewer interest.
Lighting shapes mood. Whenever possible, take advantage of natural light during the golden hour—just after sunrise or before sunset—when the sun casts a soft, warm glow. For controlled environments, simple yet effective lighting solutions such as small LED panels or household lamps can add depth and dimension to your scenes.
Audio: The Invisible Half of Filmmaking
Great visuals can falter without clear sound. Onboard microphones often struggle with ambient noise and distance. Instead, record audio using dedicated microphones, then sync to your footage in post-production. Use sound blankets or soft materials to dampen echoes when filming indoors, and always capture room tone to smooth transitions during editing.
Post-Production: From Shoot to Screen
Modern editing apps—such as LumaFusion, CapCut, or Adobe Premiere Rush—empower creators to cut, color, and polish footage directly on a smartphone. Balance your audio levels to prevent peaking, apply gentle color correction to unify your scenes, and use transitions sparingly to maintain pace.
Export at the highest possible resolution—1080p for most platforms, 4K for high-end presentations—and transfer files via cloud services like Google Drive or Dropbox to preserve quality. Remember that direct messaging apps often compress video heavily, so always share through professional channels or native app uploads.
Building a Professional Workflow
Consistency is key. Develop a routine that includes creating backups of raw footage, maintaining a project folder structure, and reviewing test clips immediately after shooting. Over time, this disciplined approach will minimize errors and maximize creative output, helping you deliver compelling content under any conditions.
Conclusion
Mobile video production has shattered traditional barriers, inviting storytellers from every walk of life to share their vision. By blending rapid advances in mobile camera technology with thoughtful planning, manual control, and post-production finesse, you can achieve results once reserved for high-budget sets. Embrace experimentation, learn from each shoot, and let your smartphone be the canvas for your stories.
Now, pick up your device, apply these techniques, and begin filming like a professional. The world is waiting to see what you create.
References
- https://www.youtube.com/watch?v=ZaqAkxHR-DM
- https://www.shopmoment.com/reviews/mobile-filmmaking-101-ultimate-guide-for-your-smartphone
- https://www.youtube.com/watch?v=0nG7pAXRgvE
- https://libguides.utk.edu/studio/smartphoneproduction
- https://www.docfilmacademy.com/blog/6-steps-to-getting-cinematic-footage-on-your-smartphone
- https://www.promax.com/blog/what-are-some-challenges-of-collecting-mobile-video
- https://www.youtube.com/watch?v=2pjYP9xpApc
- https://www.youtube.com/watch?v=RVP_igOgKq8


